
Following the launch of your website, one of the first tools you should look to set up is Google Analytics.
Google Analytics is an entirely free platform and offers business owners a set of insights into the performance of their website and marketing campaigns.
In this blog, we’ll explore nine key areas to help you set up your Google Analytics account and start measuring website performance.
You’ll need to have a Google account, so you’ll either have to create one or login.
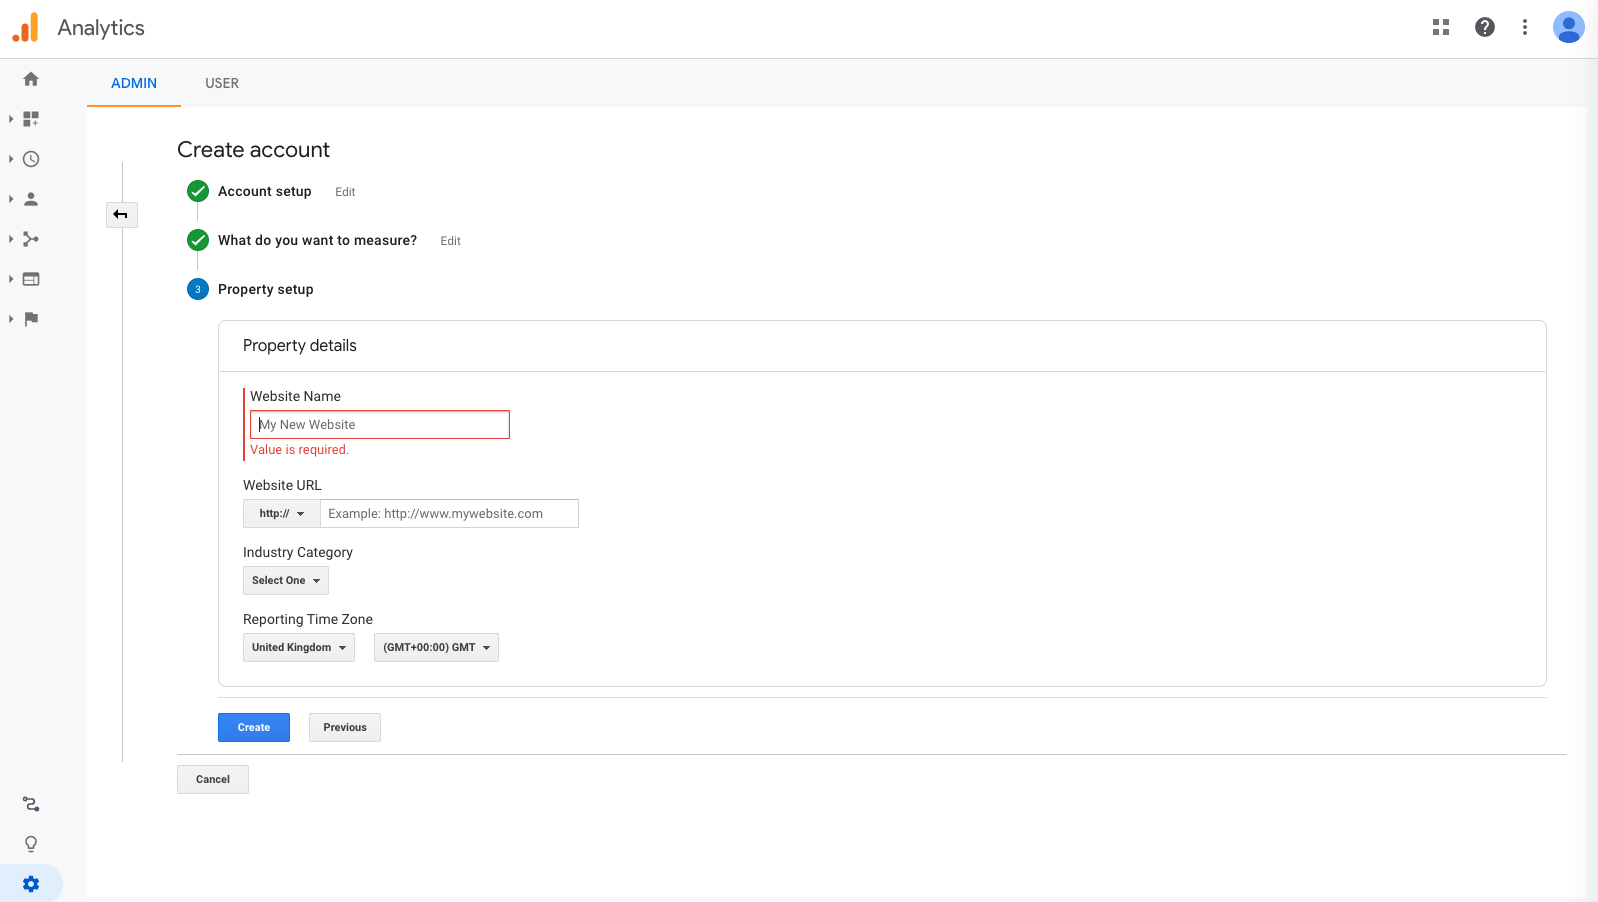
Once you’ve logged in, navigate to Google Analytics and create a new Analytics Account for your business. You’ll need to enter an Account Name (your company name), select what you want to measure (choose web unless you’re setting up an app) and then enter your property details (website name, URL, industry and time zone).
For this step, you’ll need the help of your development team or website agency to add a piece of code to your website. In the ADMIN area under property, go to Tracking Info / Tracking Code.
![]()
Once here, you’ll see some instructions on how to add the tracking code to your website as well as your Tracking ID, which is unique to your analytics property. Send this code to your agency/ developer, and they’ll be able to add it for you. Once added, you’ll need to test the connection.
![]()
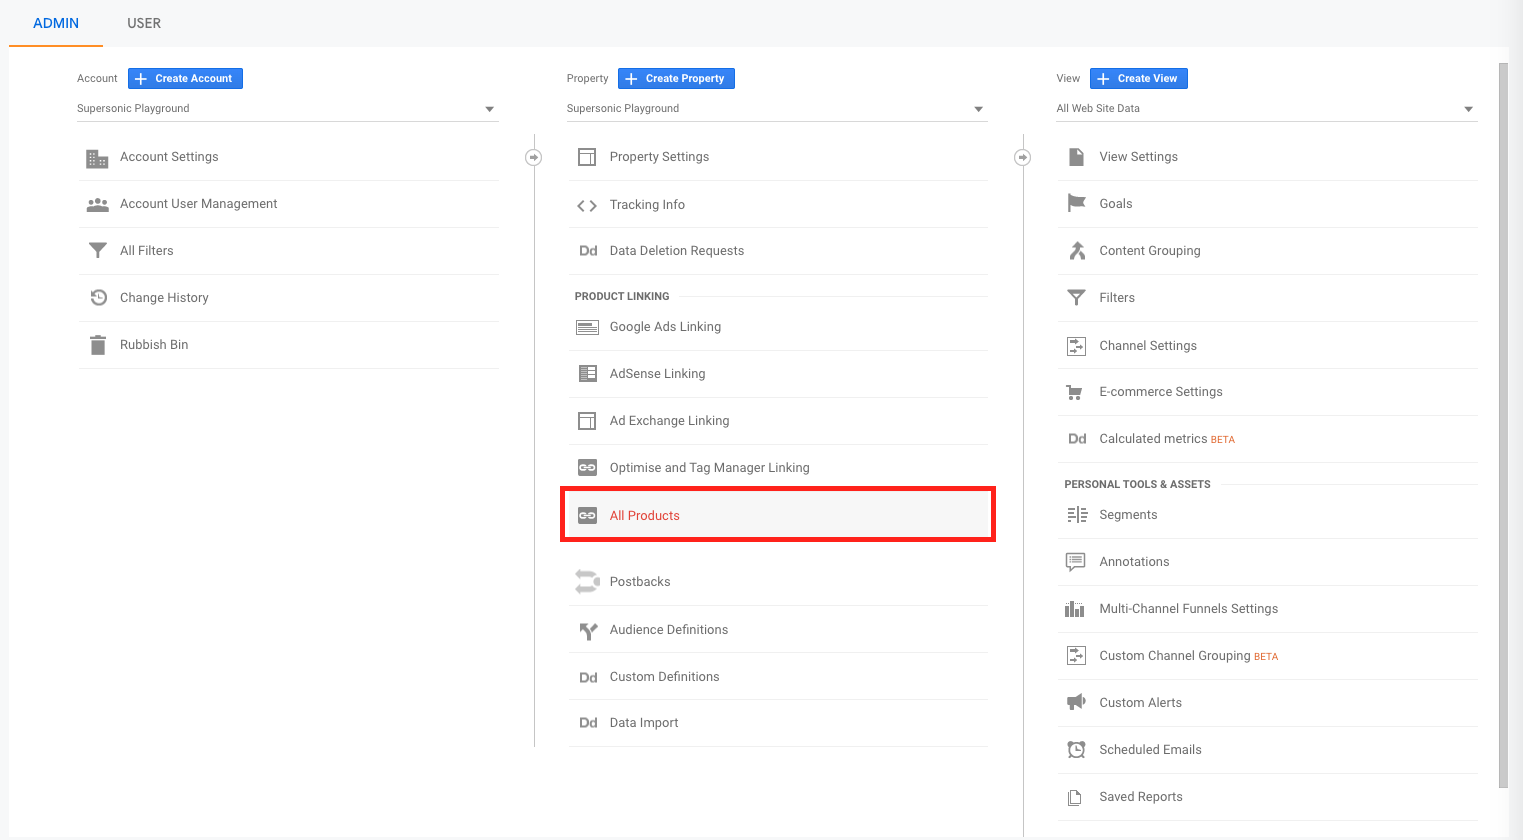
Once you’ve created your GA account and tested your connection, the next step is to integrate your Account with Google Search Console, which will give you more significant insights into your website’s performance. To do this, navigate to the ADMIN area and, under property, select ‘All Products.’
Once here, you’ll be able to control how your Analytics links to other Google products (not just Google Search Console). To link, find Search Console in the list of products and click ‘Link Search Console.’

To link, you’ll need to set up a connection between your Analytics and Search Console accounts.
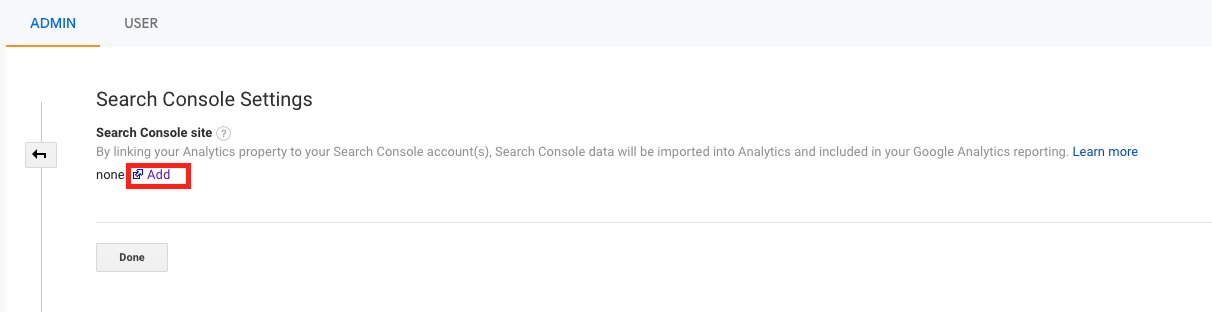
Clicking this will open up a window asking you to verify your Search Console page. If you don’t already have a Search Console account, you’ll need to set this up before doing this step.
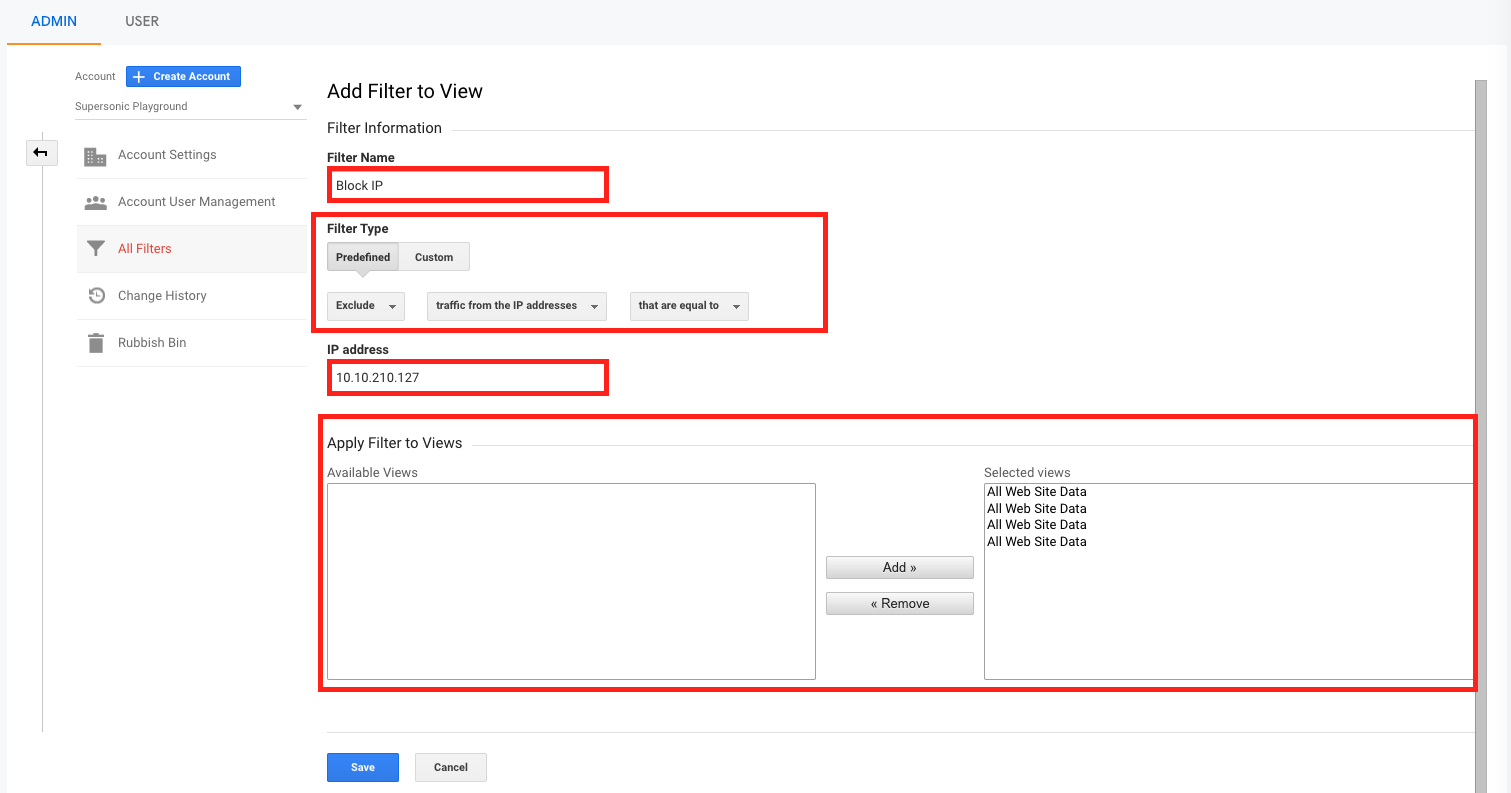
You’ll likely be navigating your business on a weekly, if not daily, basis, and you don’t want your on-site behaviour to impact your Google Analytics data. To avoid this, you’ll need to block your IP address by heading to the ADMIN area and then ‘All Filters’ under Account.
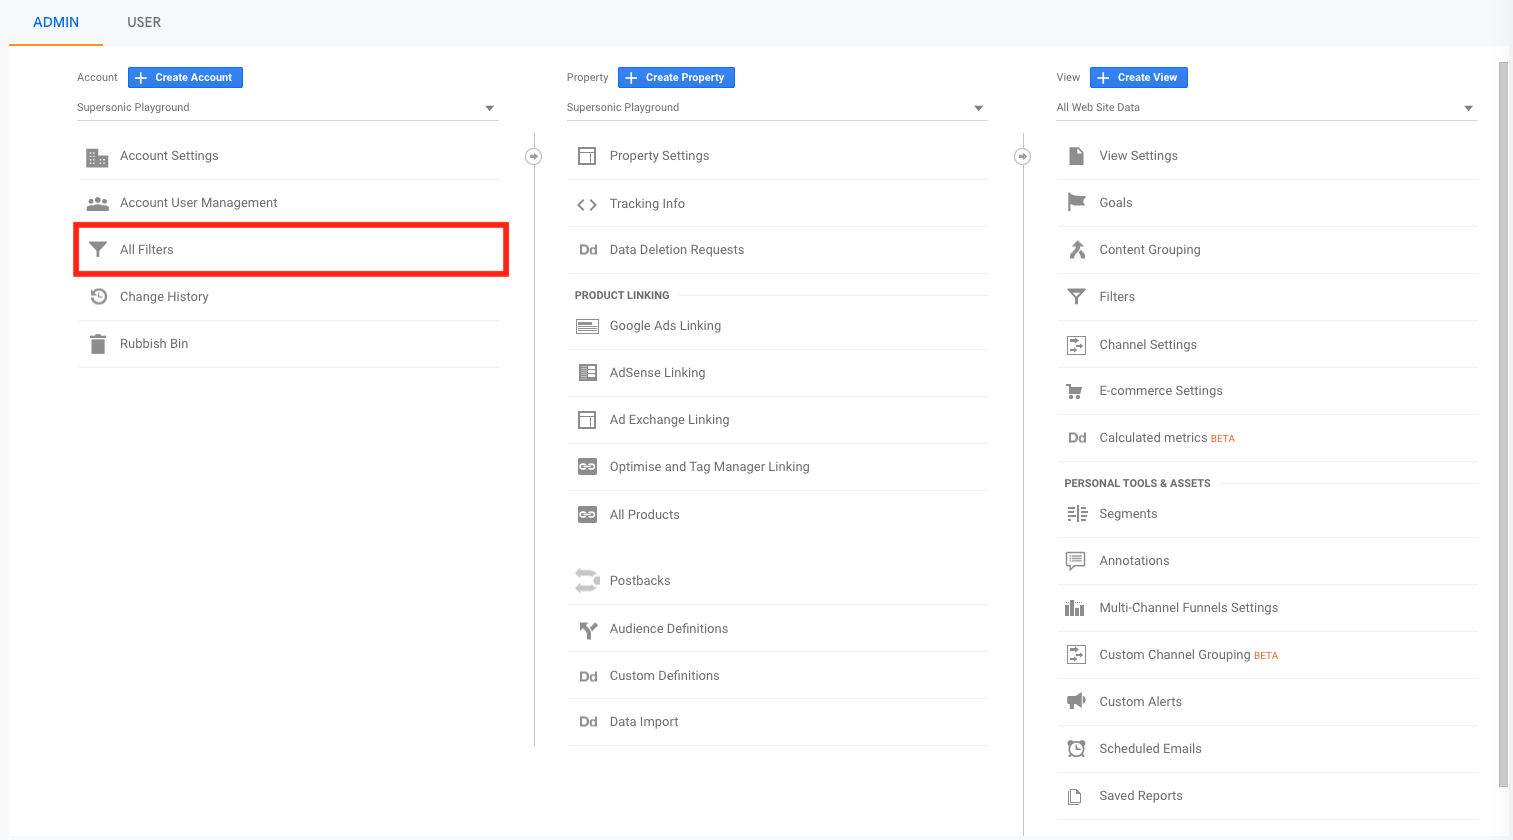
Then select + Add Filter.
![]()
Give your Filter a name, for example, ‘Block IP,’ then choose your Filter Type. For this step, you’ll need to make this Predefined, Exclude traffic from the IP address that is equal to (as shown in the screenshot below). Then add your IP address and make sure you add All Web Site Data to your selected views and click Save.
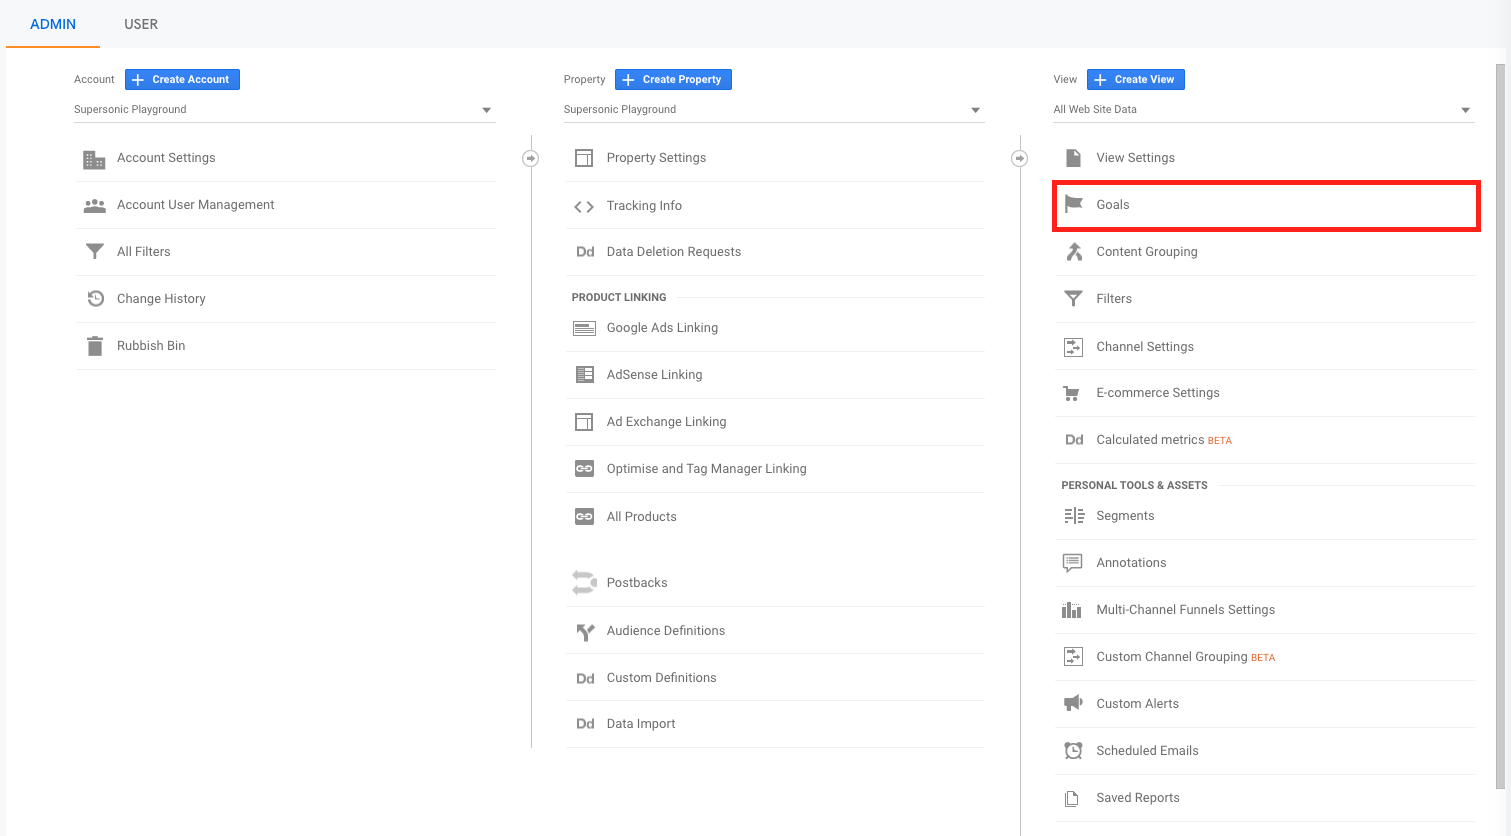
A goal is a way of tracking conversions; these can be purchases or form submissions. Setting up your goals will enable GA to tell you how well your site, campaigns, and channels convert to give you goal conversion rates and information about which content generates conversions. To create a goal, navigate to your ADMIN area and then select Goals under View.
Here you’ll see all of your goals and their status (on/off). Click the + New Goal to create your goal.

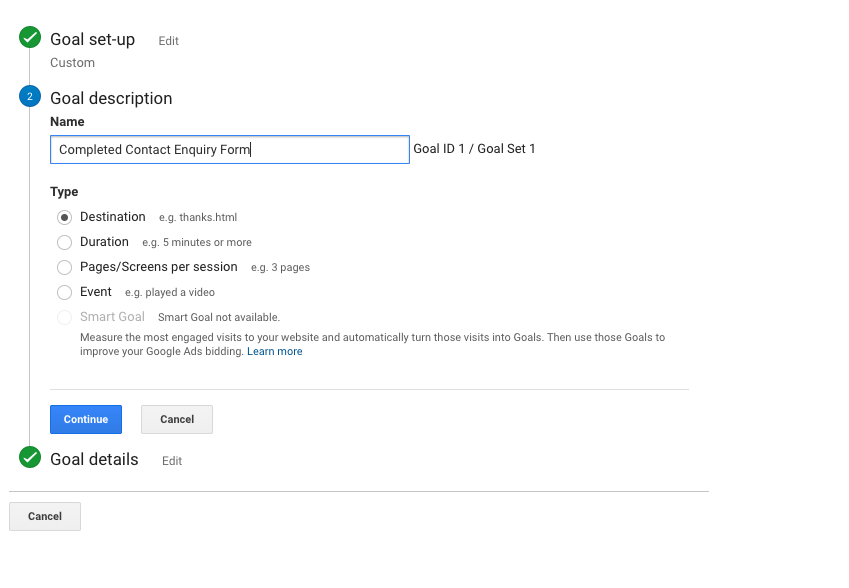
Next, you’ll need to fill out several details about your goal, including the Name and Type of Goal. This could be a destination, duration, pages/ screens per session or event. For this example, we’ve created a Goal for a Contact Us form submission.
A UTM (Urchin Traffic Monitor) allows you to uniquely track the performance of individual campaigns by adding a string of code to the end of your target URL. It makes it easier for GA to track the performance of that specific campaign, including clicks, conversions and engagement. A typical UTM looks a little like this: https://www.supersonicplayground.com/resources/blogs/everything-you-need-to-know-about-accelerated-mobile-pages-amp/?utm_source=friday_insights&utm_medium=email&utm_campaign=AMP_blog
You’ll need the following:
You can also use Campaign URL Builder, which will generate the UTM for you.
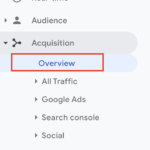
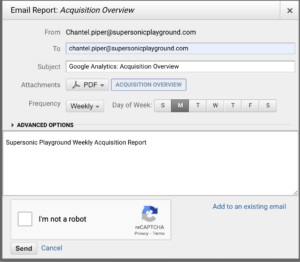
Keep on track of your website’s performance without accessing GA directly with reports. For this example, we’ll show you how to set up a weekly email report of your Acquisition data. But, first, Navigate to the Acquisition/ Overview area.
Then navigate to the Share option in the top right-hand corner of your report.

This will open up a window where you can then select the recipient, frequency and content of the email to save click Send.
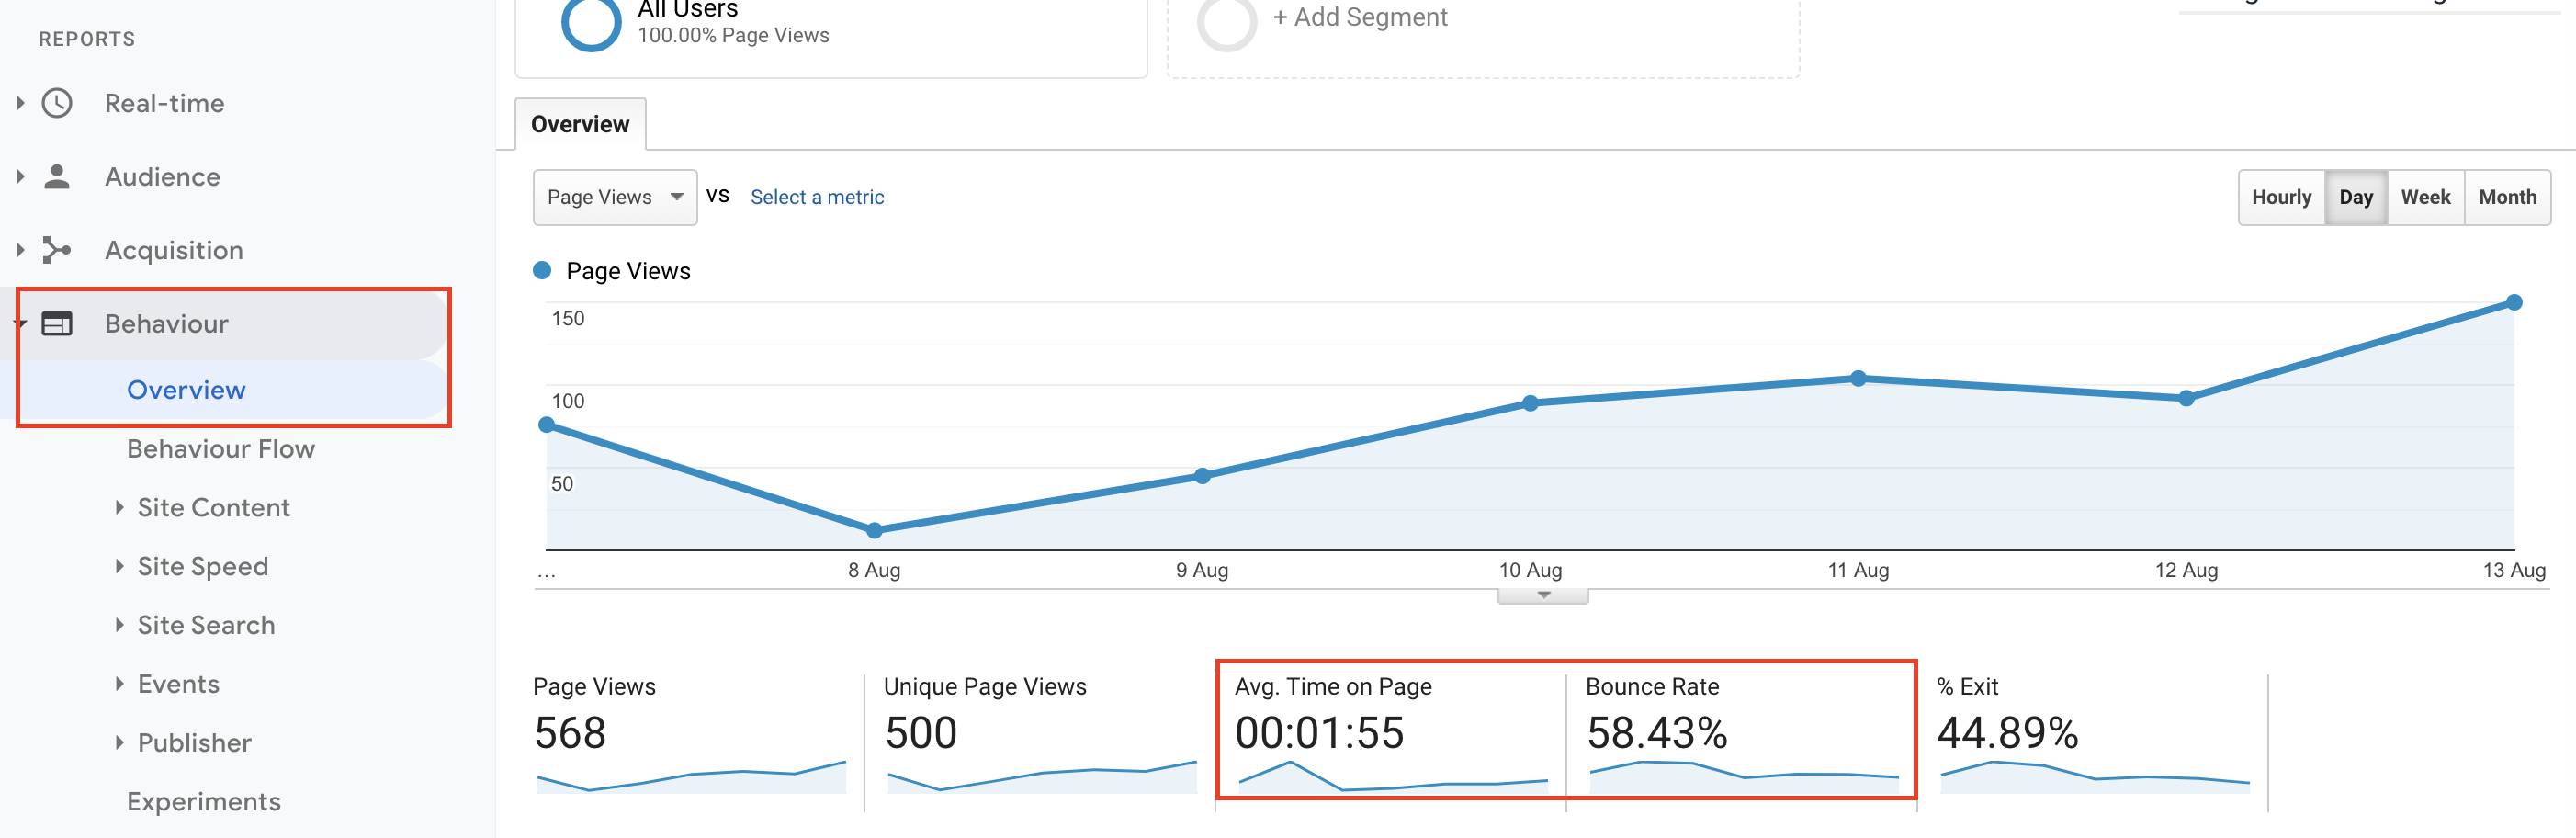
To see how your audience is engaging with your website, you can use the Behaviour Overview report to look at your statistics for average time spent on a page and bounce rate.
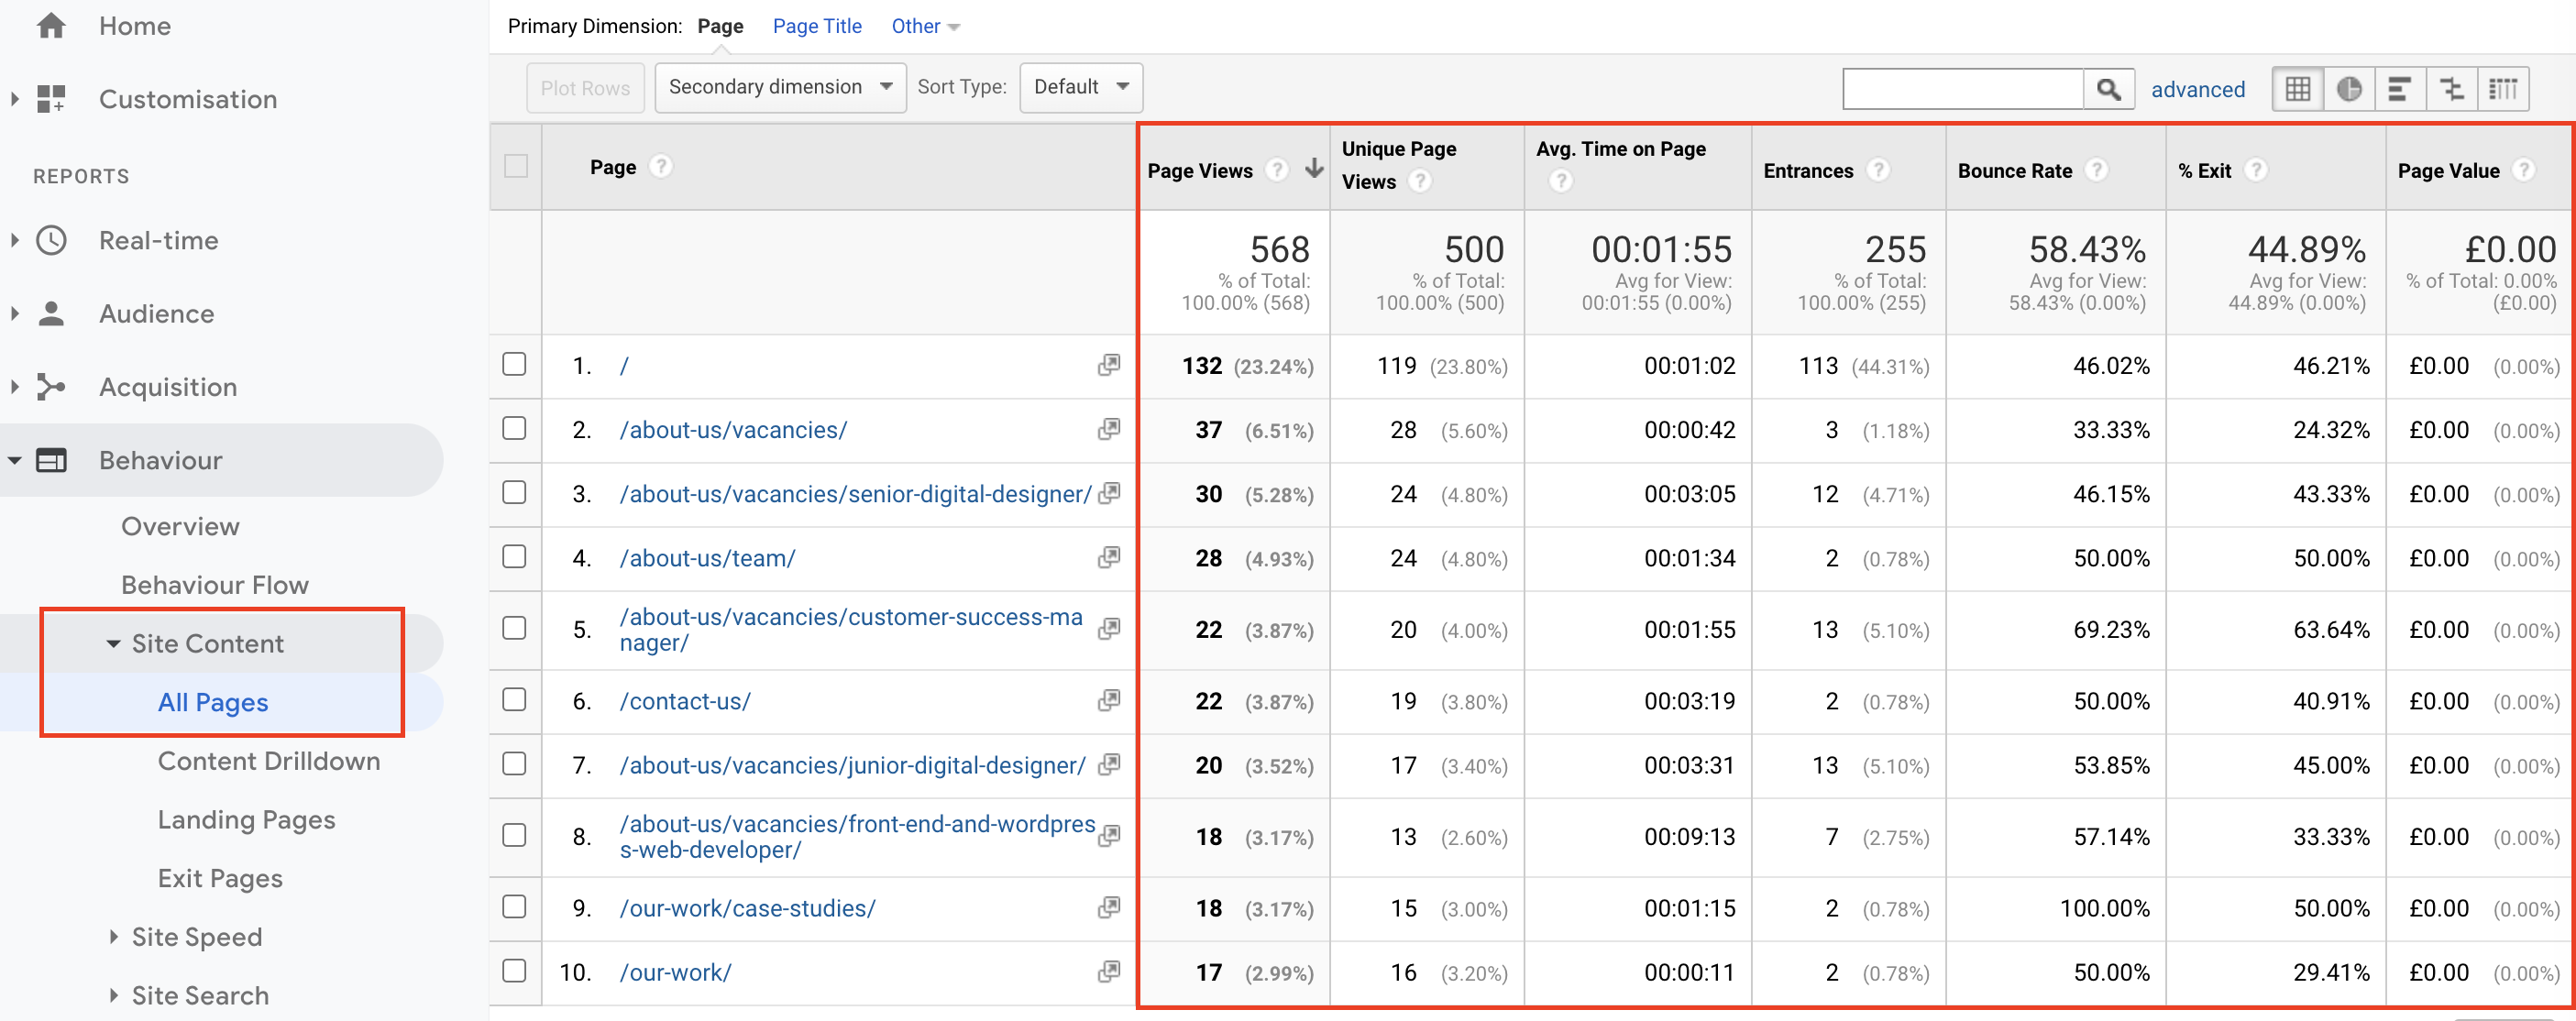
You can also get a breakdown of your page performance using the Site Content/ All Pages filter.
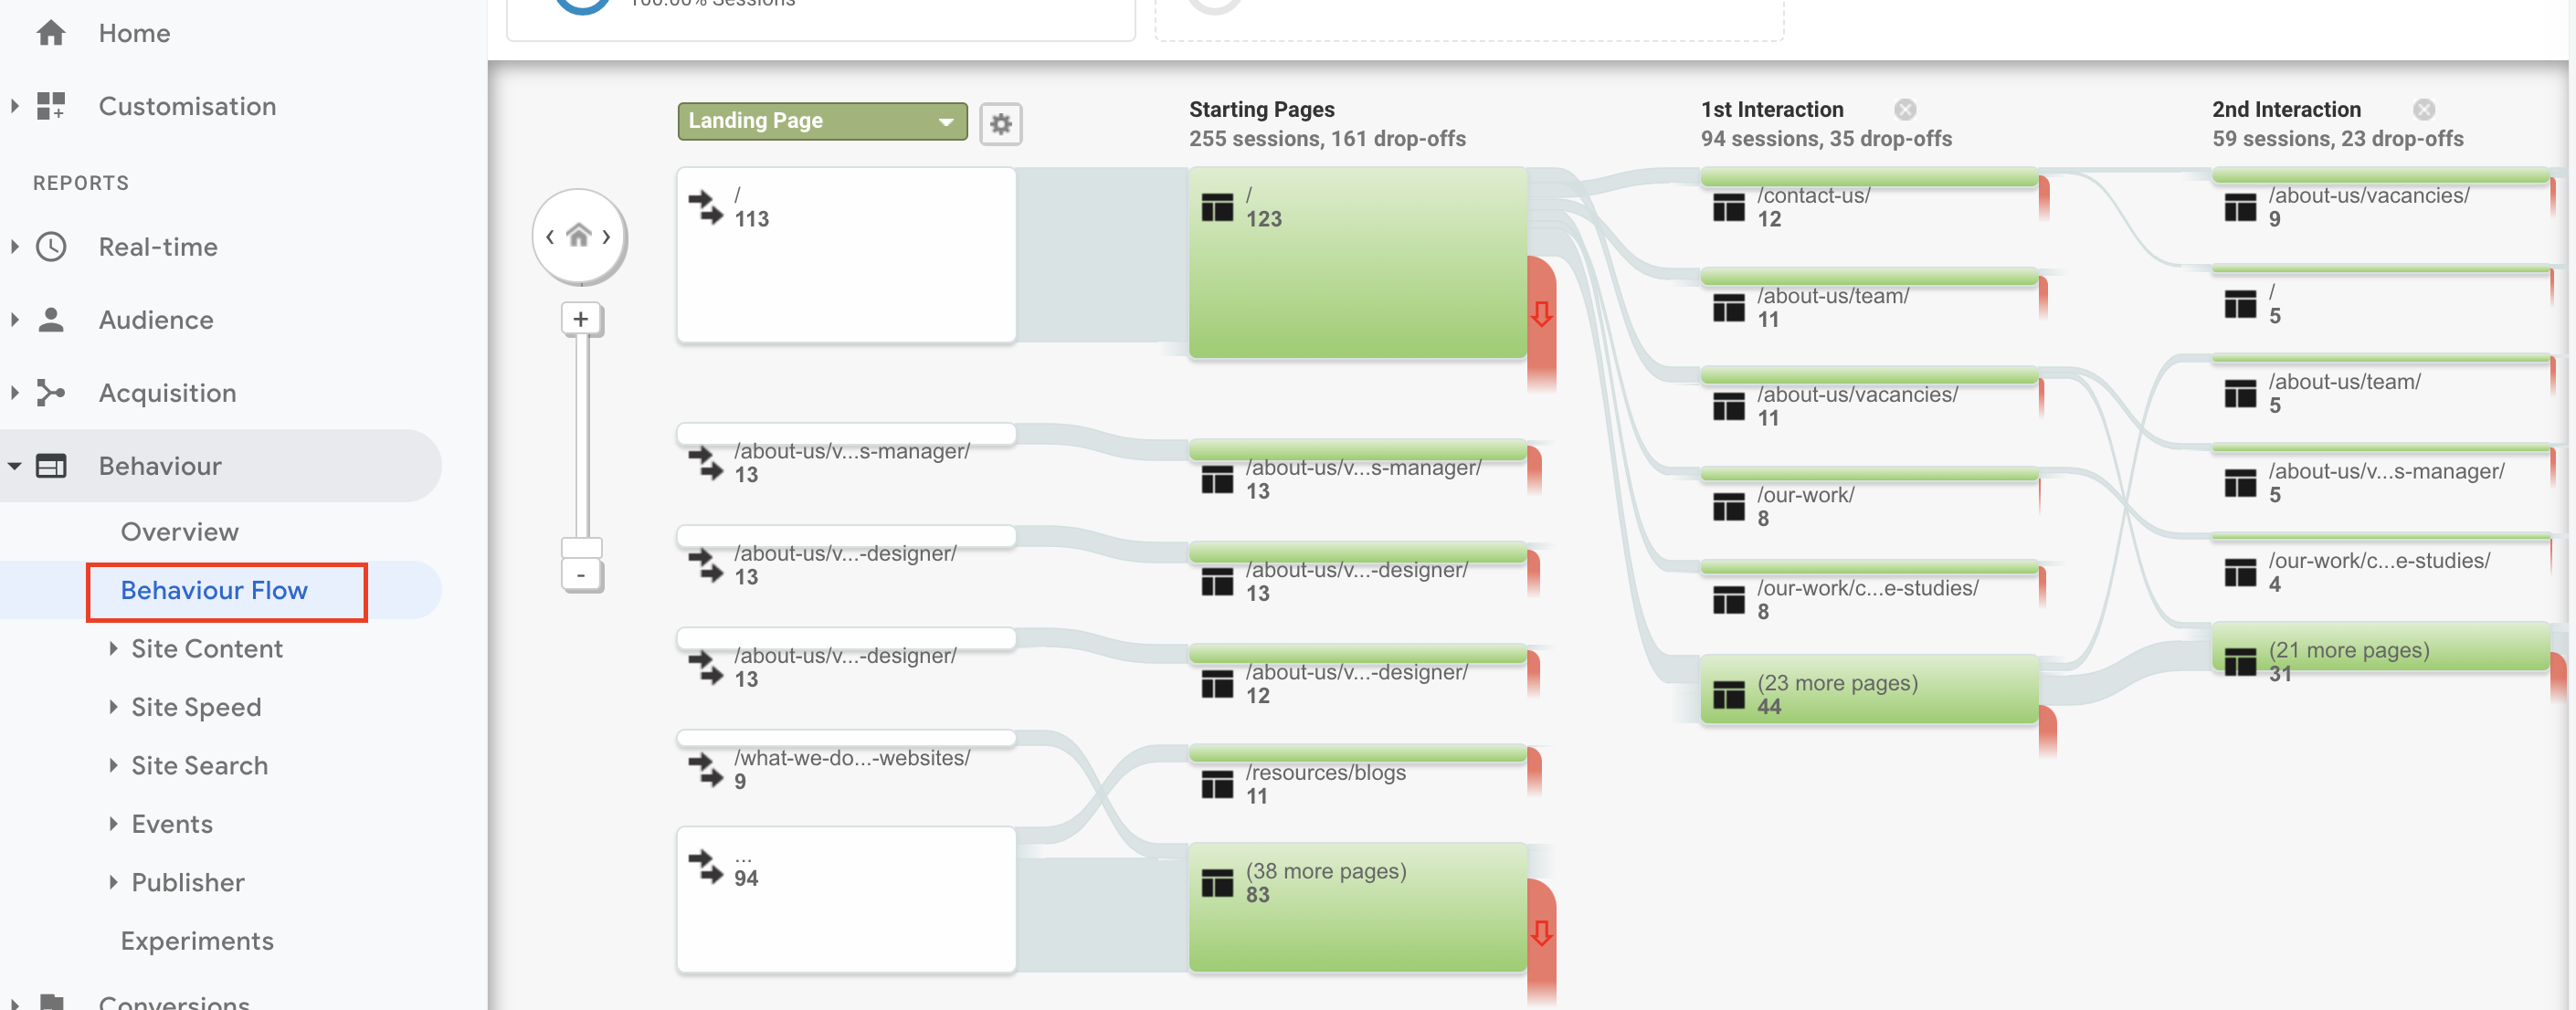
The Behaviour Flow report will give you a visual idea of where users are dropping off in the journey and where you might make some improvements.
You can learn valuable demographic data about your users via Google Analytics, but first, you’ll need to enable Demographic data collection. You can do this by navigating to the Audience/ Demographic/ Overview section, where it will ask you to enable the feature.
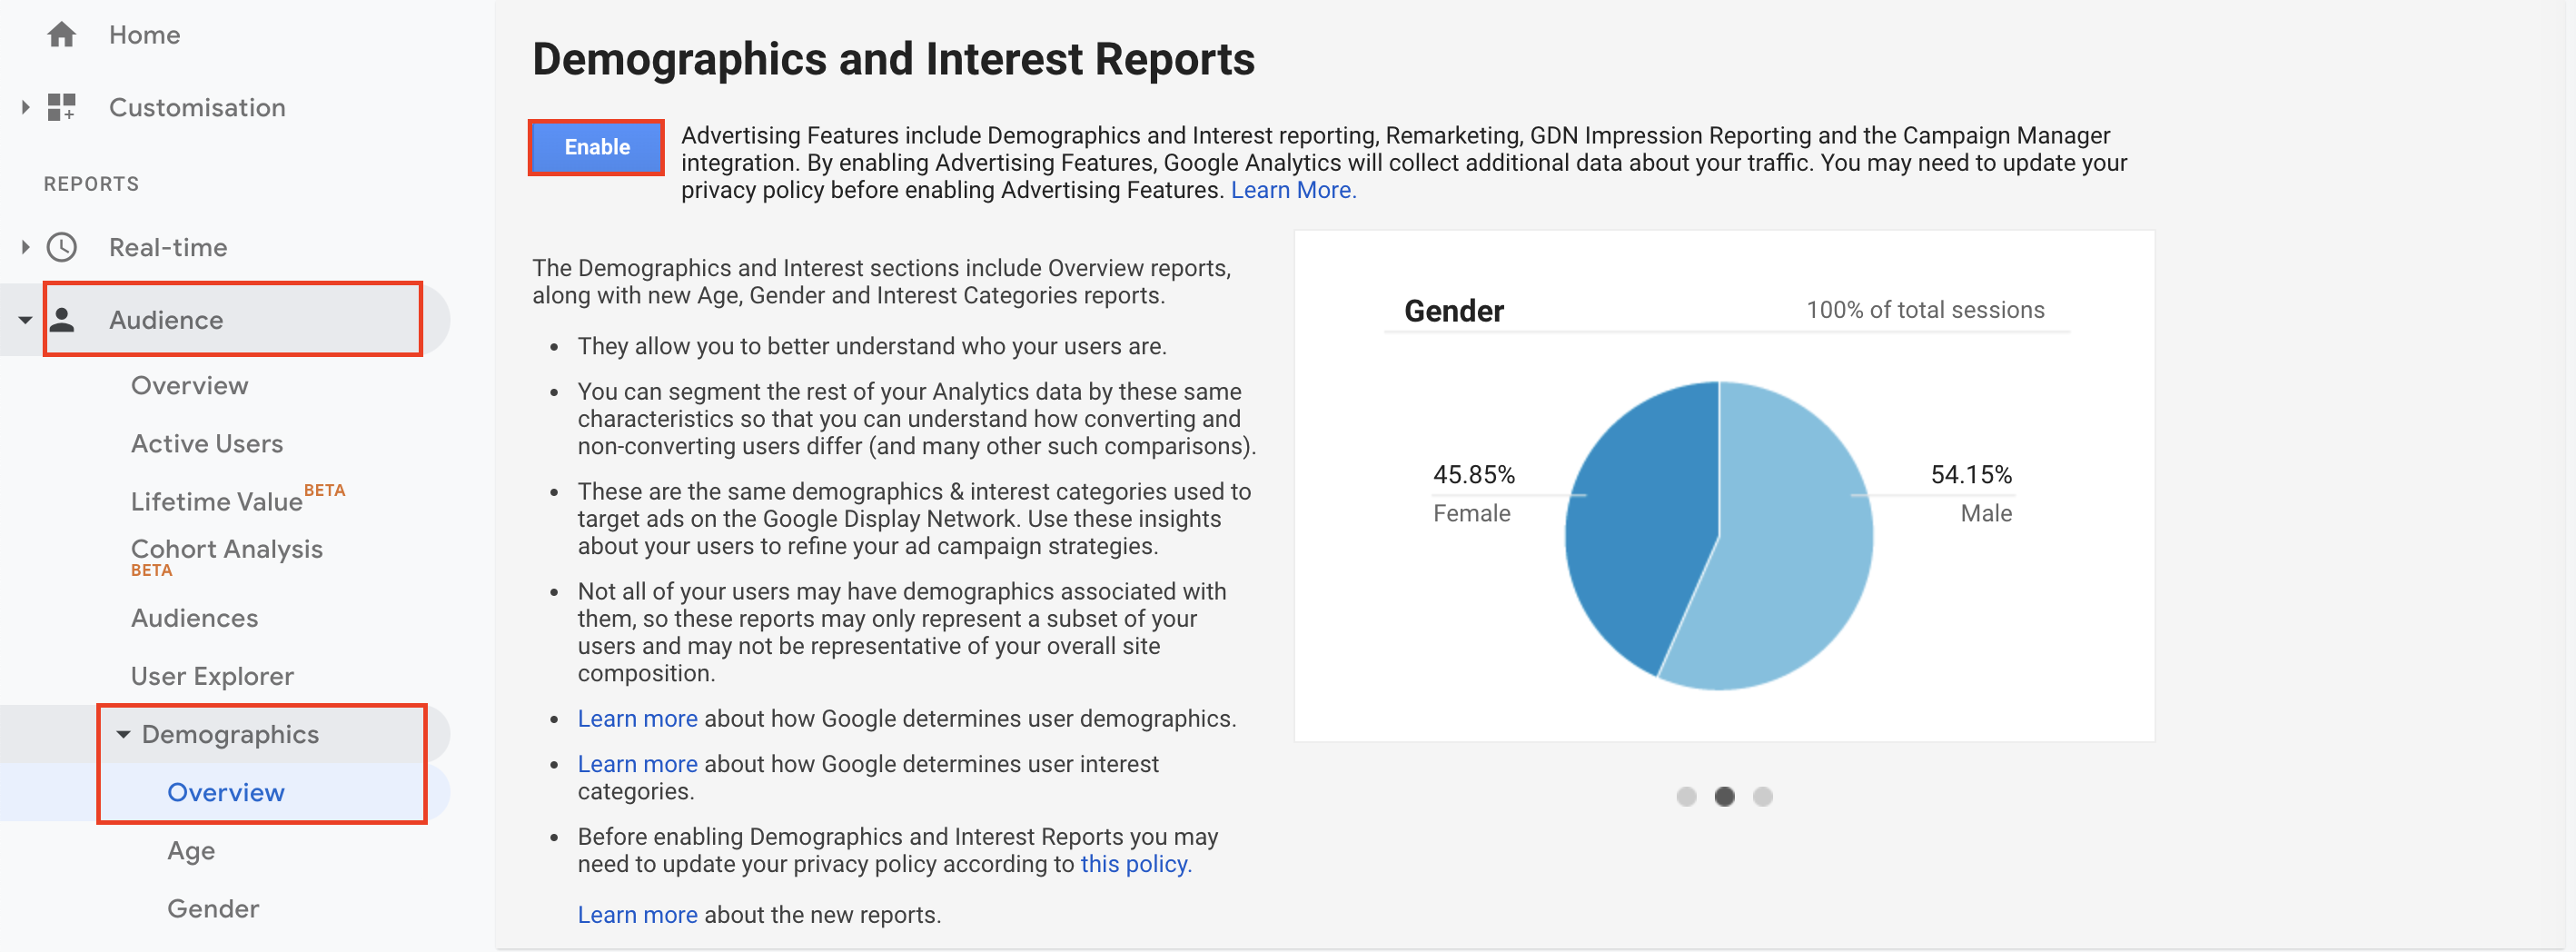
Once activated, the report takes 24 hours before you’ll be able to see data. However, you might want to leave it a month or two before you start seeing this as a valuable data source. When you’re ready to begin reviewing your demographic data, navigate to the same area to see data about your user’s age, gender and interests.
When set up and used correctly, Google Analytics can be a valuable asset for monitoring the performance of your website. GA can also be used to inform and improve your website in line with consumer behaviour and engagement.


Our friendly team is ready to help you bring your vision to life. Whether you’re ready to start your project or just want to discuss your options, we’d love to hear from you.